Managing Your Content
8. Managing Your Content (Desktop)
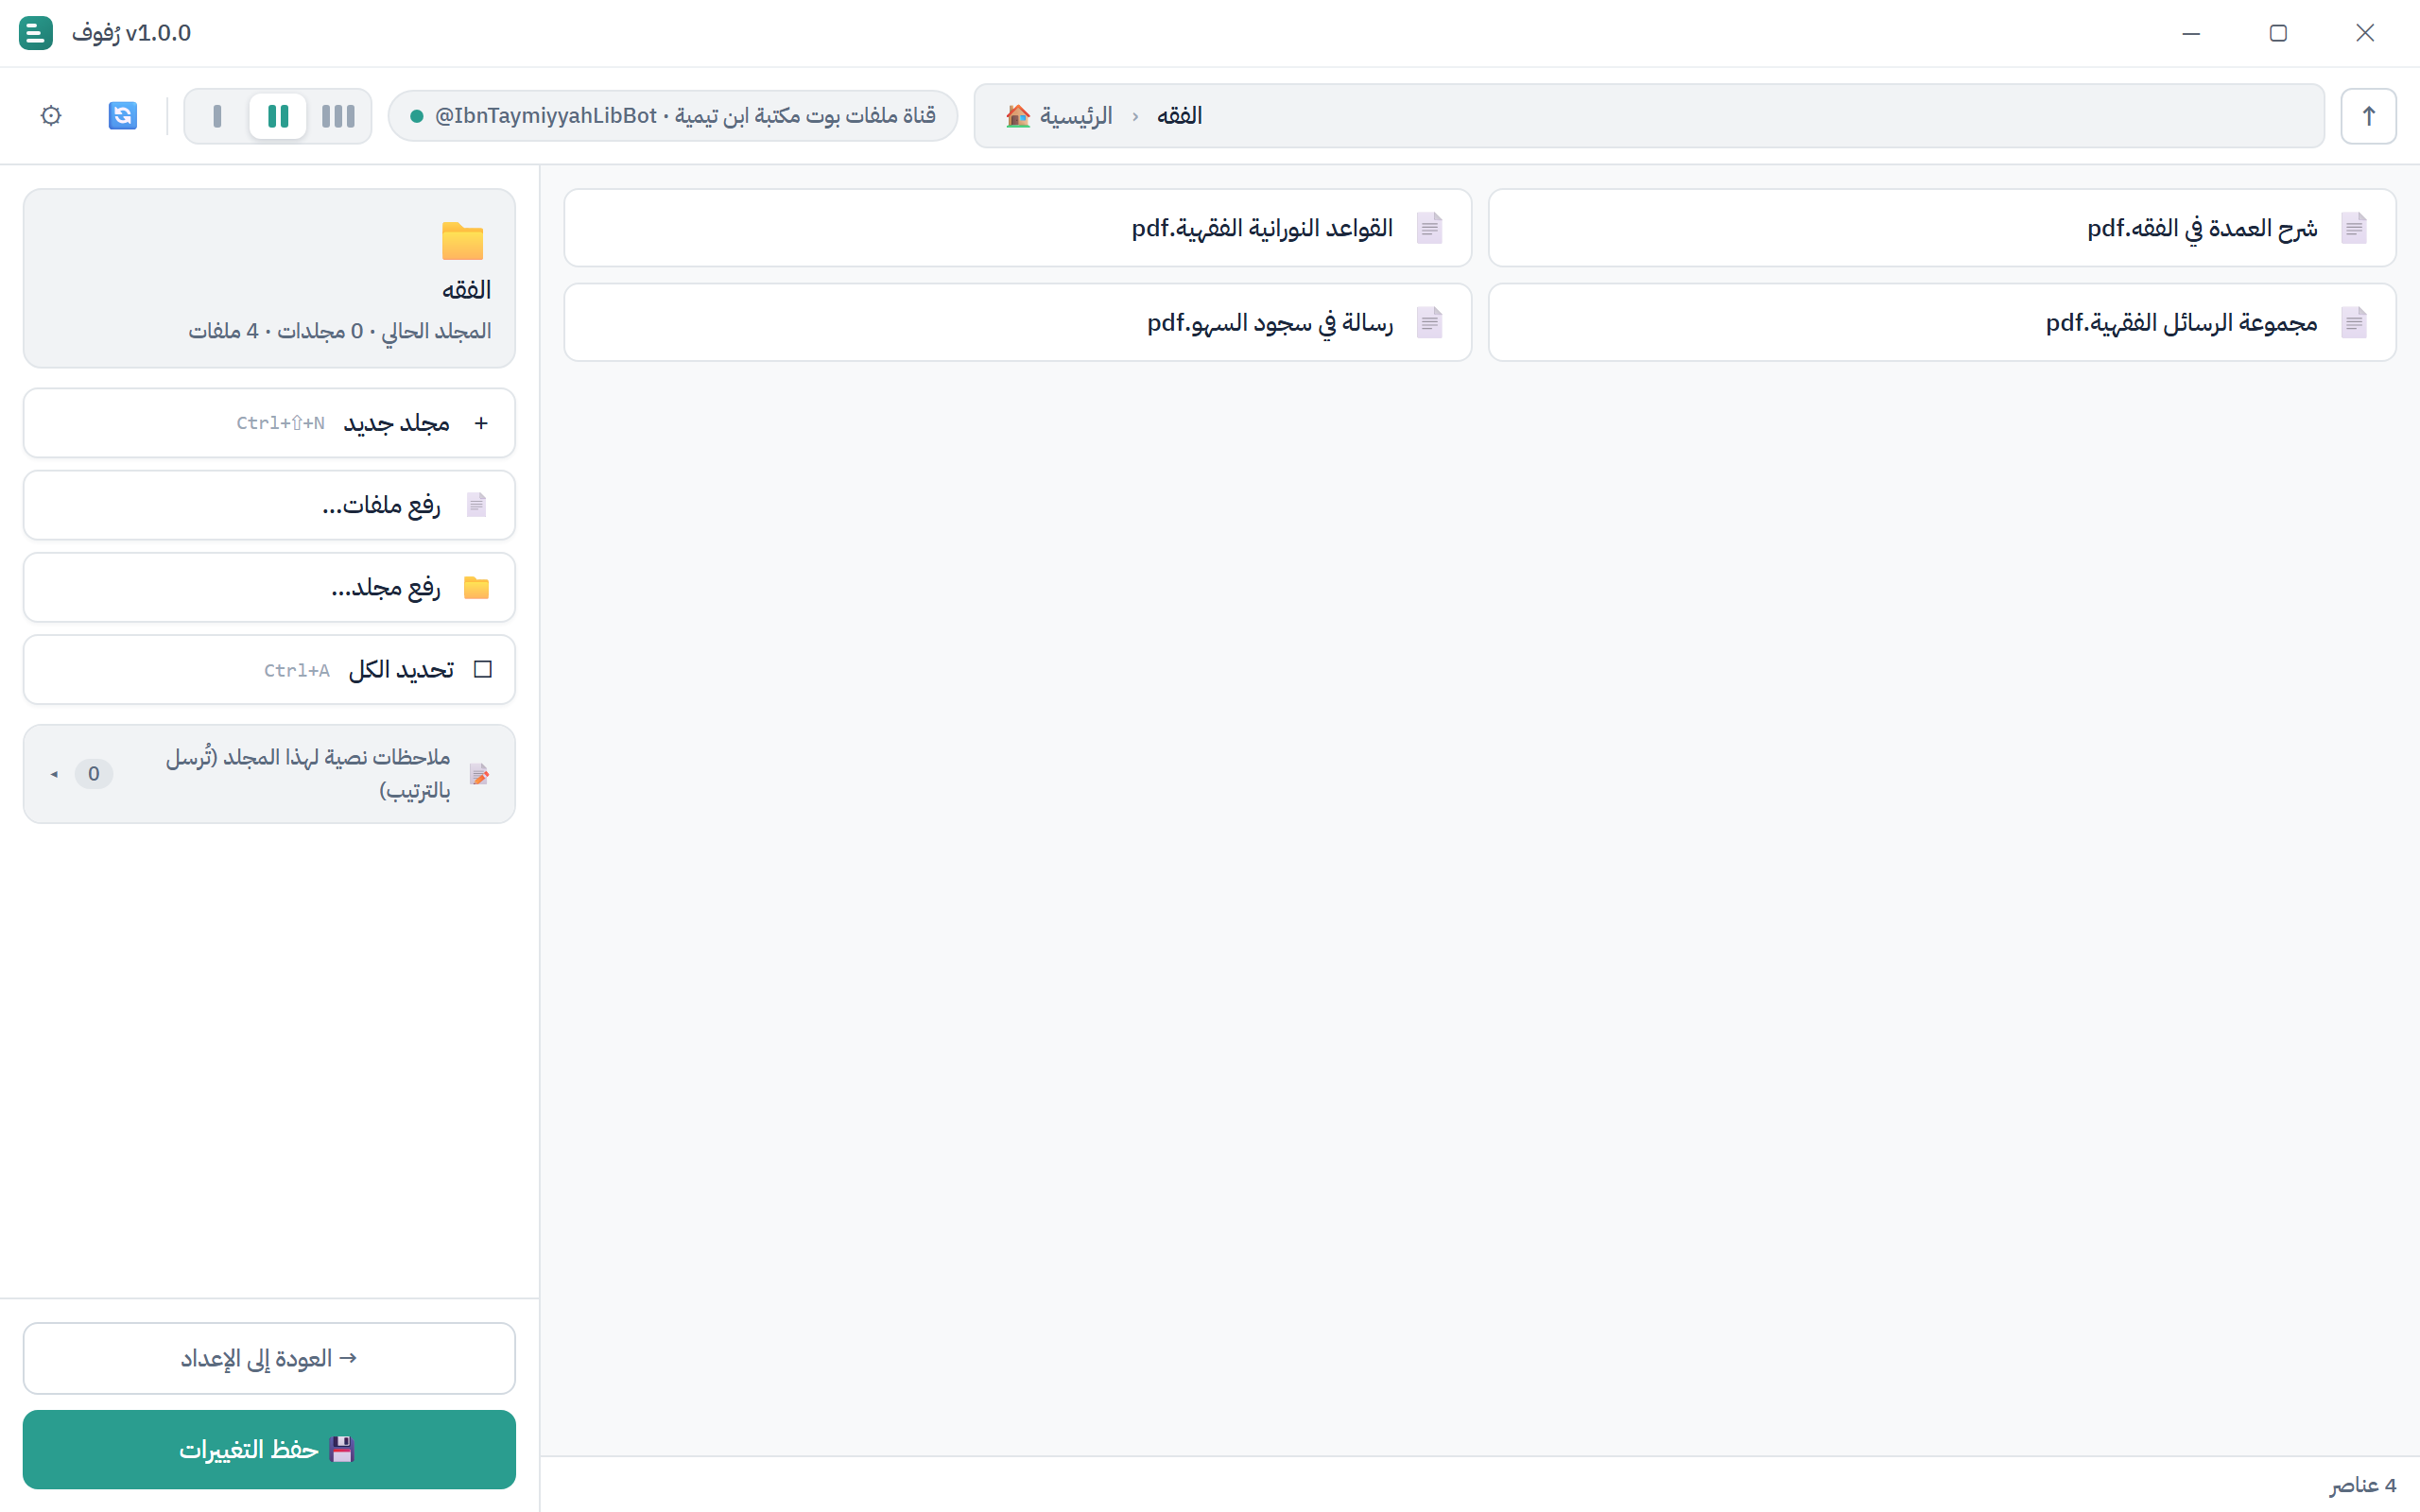
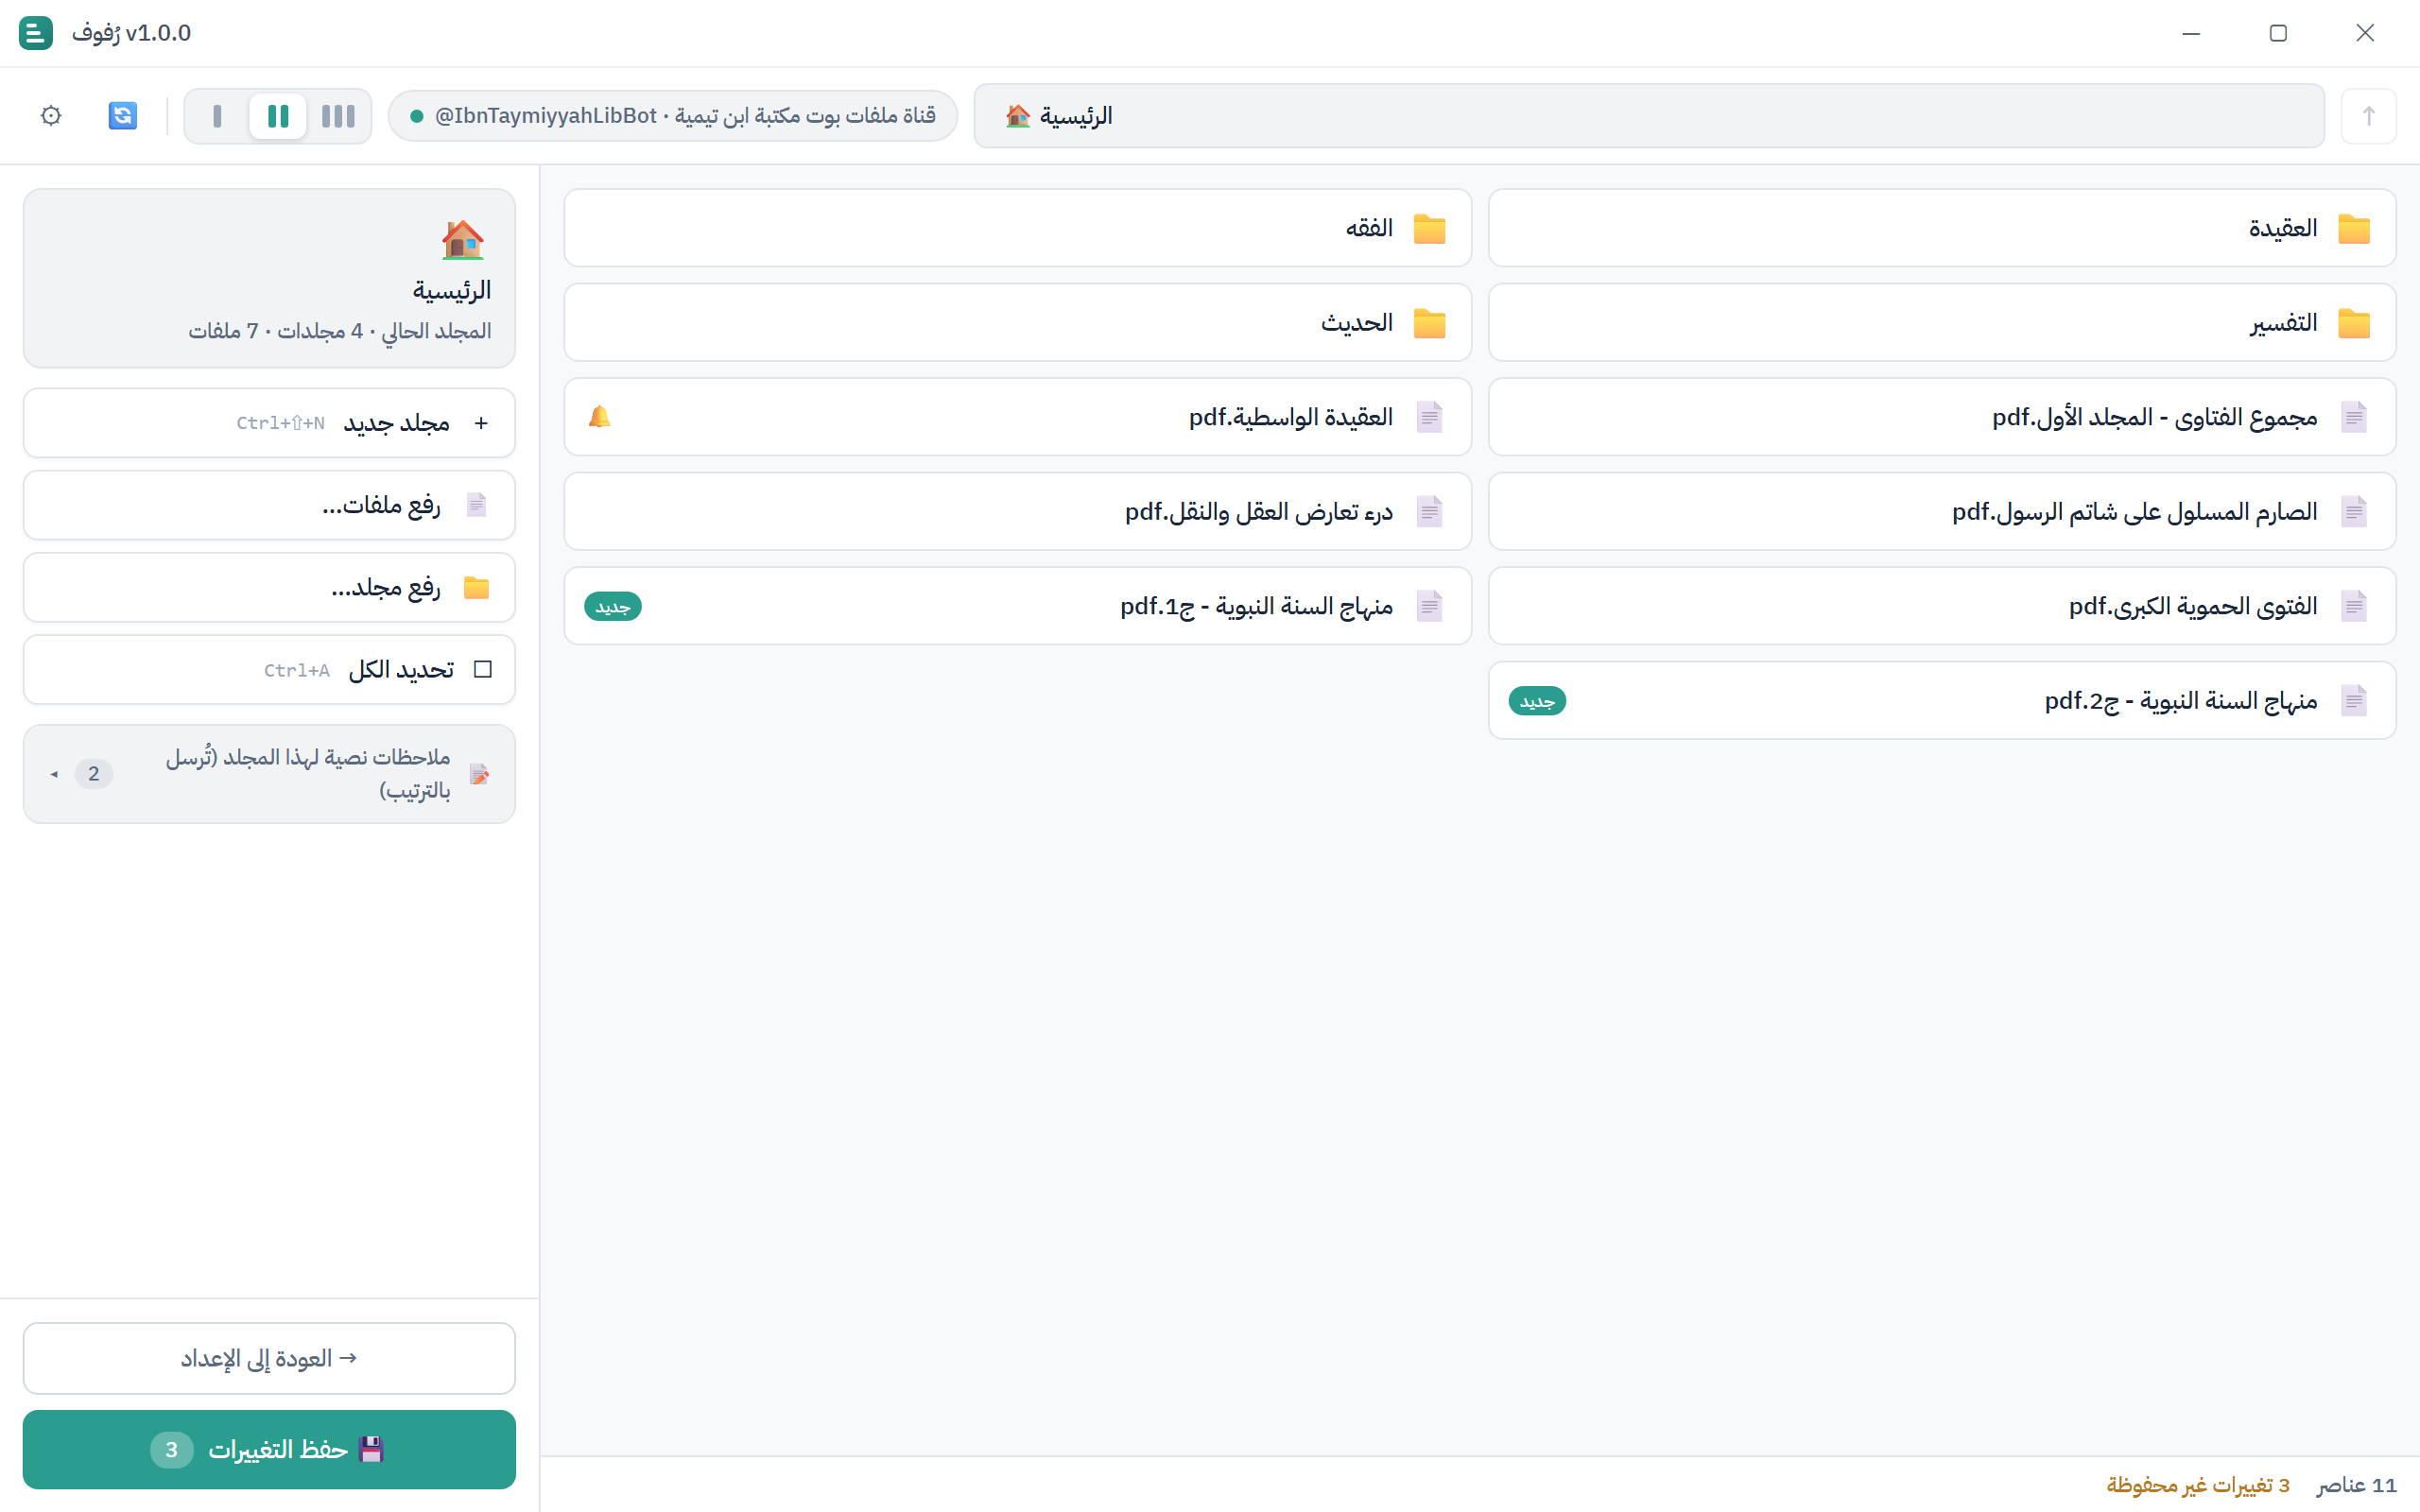
The content viewer is where you add, remove, rename, move, and reorder your bot's files on the desktop — without re-uploading everything. It works just like Windows File Explorer (or Finder on macOS): click to select, drag to move, right-click for a menu, and use familiar keyboard shortcuts.
Open it: on the setup screen, enter your bot token and click Open bot content. The viewer shows your bot's current folders and files.
Getting around
- Breadcrumb at the top shows where you are and lets you jump back to any level.
- Open a folder — double-click it.
- Go up one level — click ↑ Up in the toolbar.
- Back to the setup screen — click ← Back (you'll be asked to confirm if you have unsaved changes).
- Columns — a density control sets how many columns the grid uses, matching how your bot's menu will look.
Selecting items — just like Explorer
Selection is always available:
- Click a tile to select it.
- Ctrl + click to add or remove individual items.
- Shift + click to select a range.
- Ctrl + A selects all — press it again to deselect all.
- Click an empty area to deselect everything.
- Drag a box across empty space (marquee / rubber-band) to select everything it touches.
The action panel on the side changes to match what you've selected — one file, one folder, several items, or nothing selected — showing only the actions that make sense.
Adding files and folders
You have two ways to add content, and both drop it into the folder you're currently viewing:
Drag and drop — drag files (or a whole folder) from Explorer/Finder and drop them anywhere on the grid.
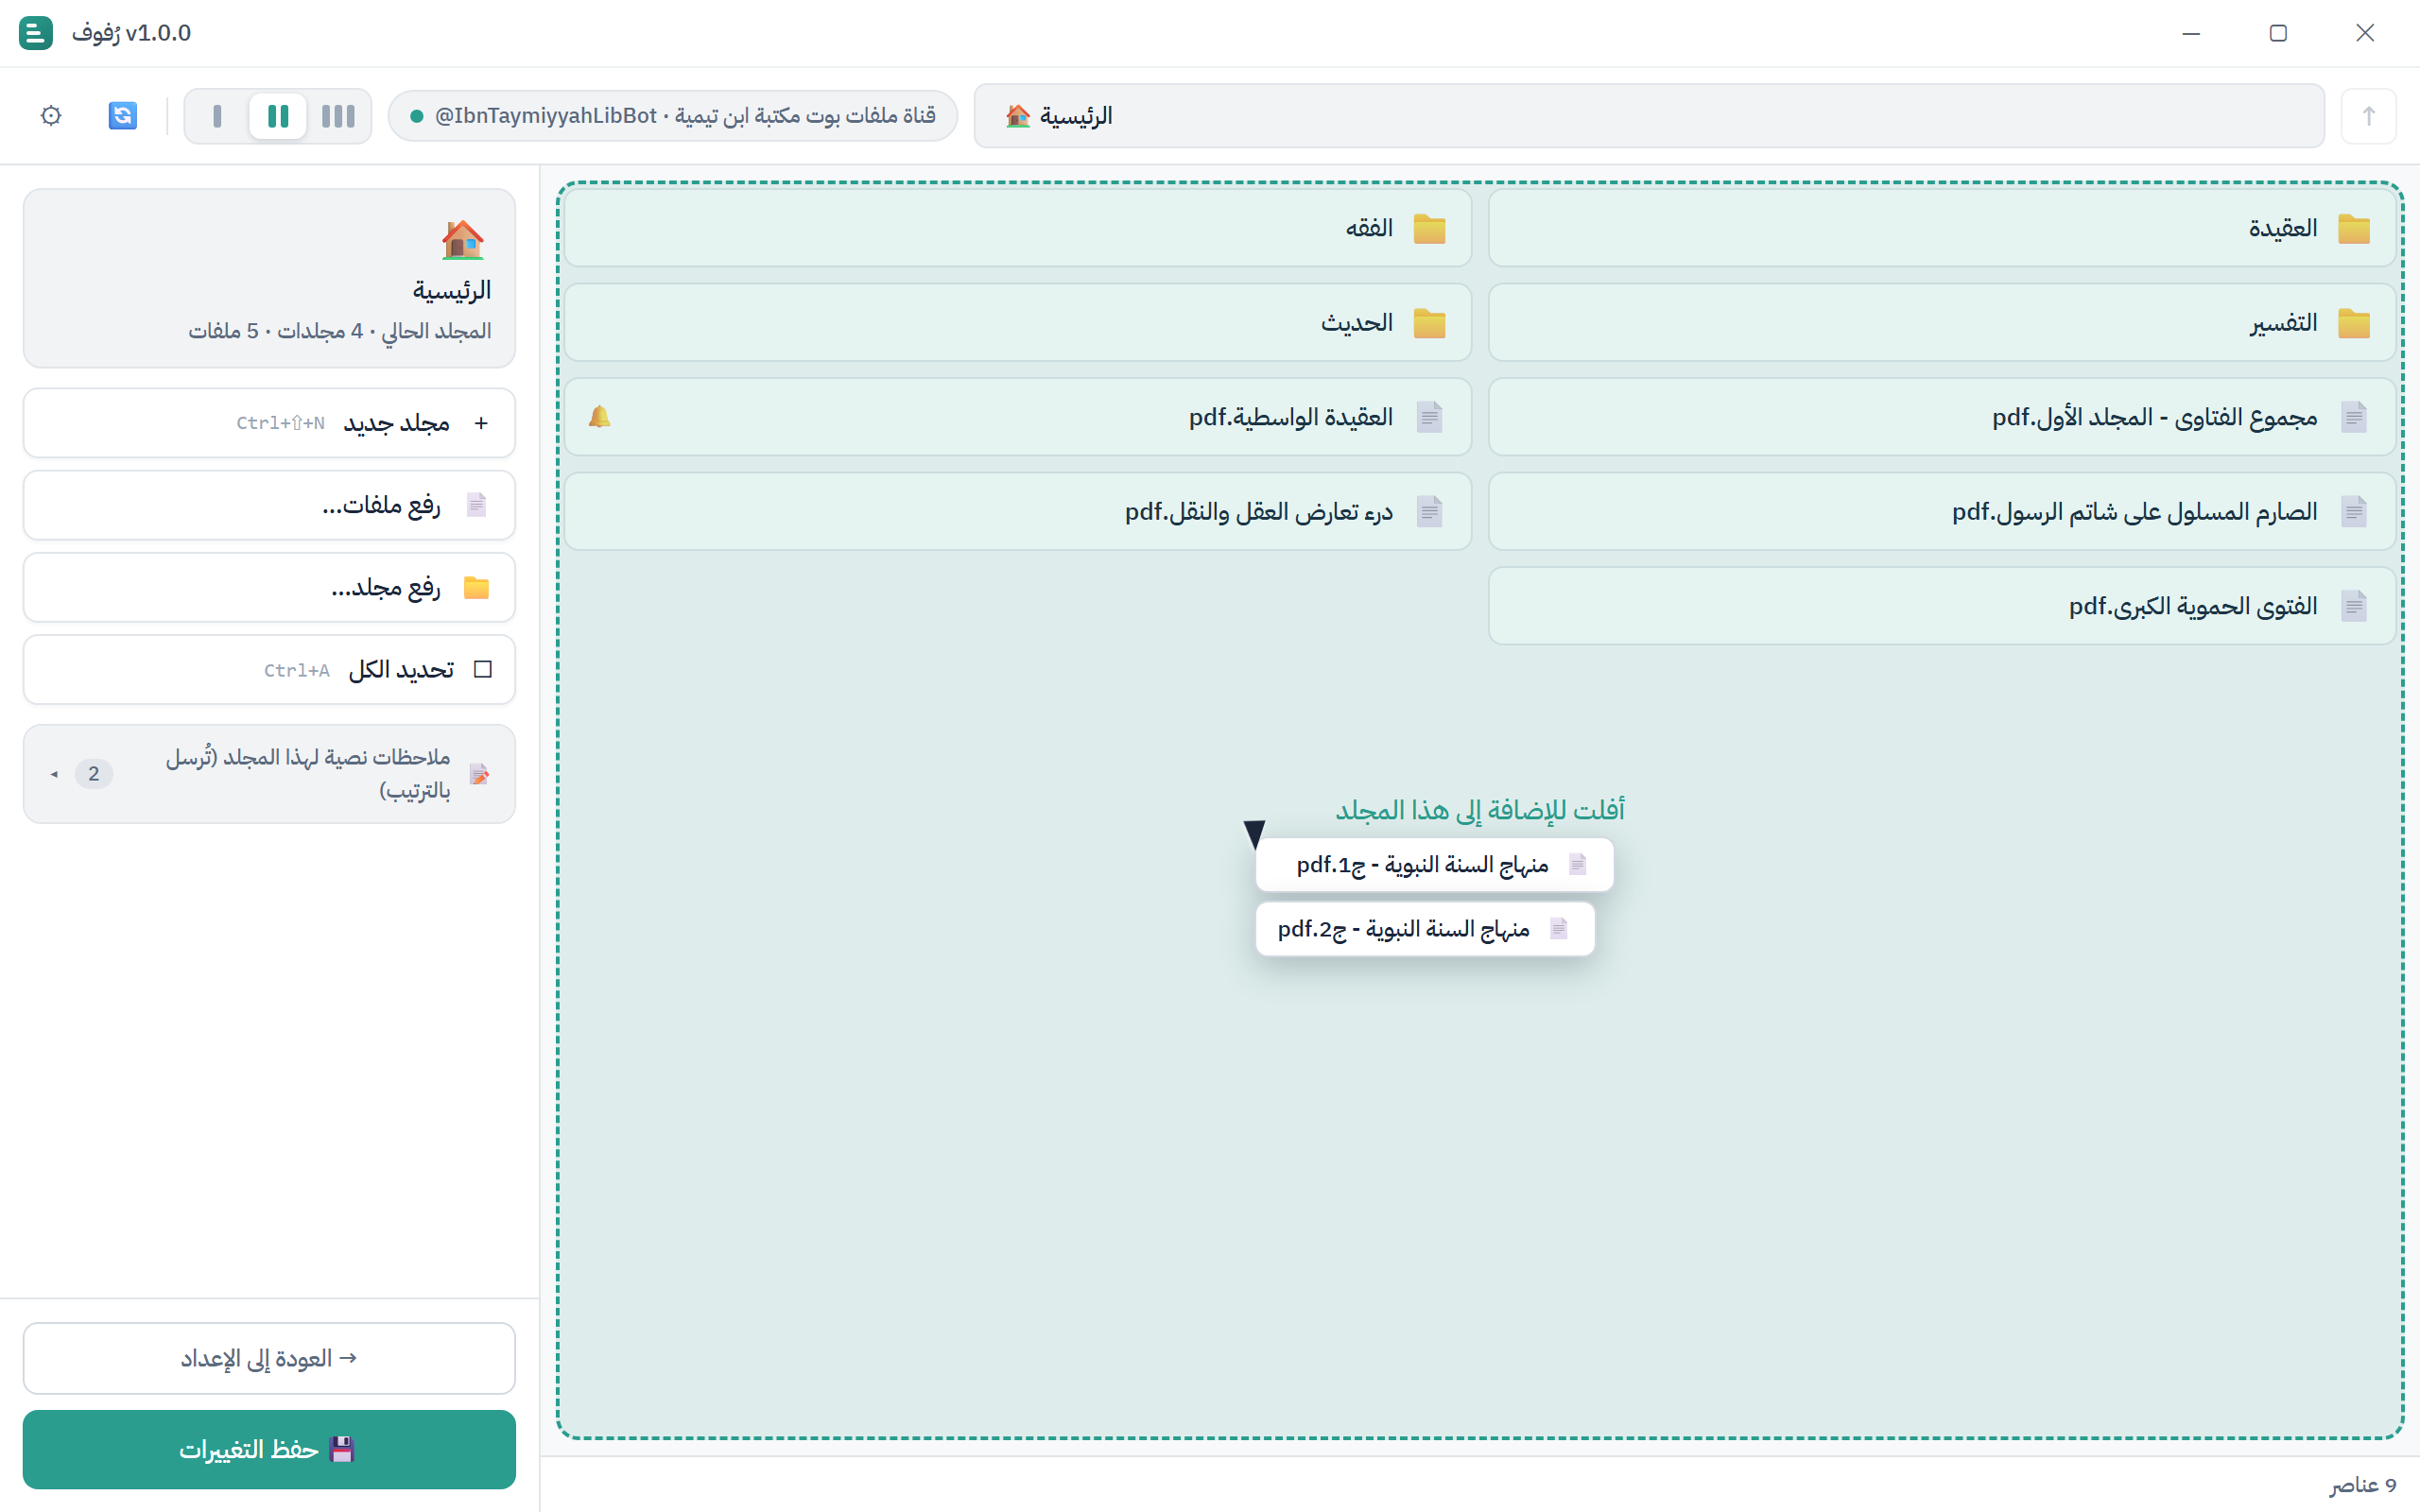
Upload from your computer's file picker — when nothing is selected, the action panel shows Upload files… and Upload folder… buttons (also available by right-clicking an empty area). Upload files… opens a normal multi-file picker; Upload folder… adds an entire folder (including its subfolders).
New items appear with a colored outline showing they're pending. They're uploaded to Telegram when you click Save.
Adding a folder that already exists
If you add a folder with the same name as one already in your bot, Rufoof asks to confirm, then replaces it. Files that didn't change are kept as-is (not re-uploaded); only new or changed files are uploaded.
Large files
When you save, Rufoof asks what to do with any file over 50 MB. See Large Files.
Up to 100 items per folder
A single folder — and the top level — can hold at most 99 items (files and subfolders combined), because that's the most buttons Telegram can show in one menu. If a folder goes over, Rufoof warns you when you save. Your bot can hold far more overall; just split a crowded folder into subfolders.
Deleting
Select one or more items, then delete them in whichever way you prefer:
- the Delete action in the side panel,
- right-click → Delete, or
- the Delete key (Cmd + Backspace on macOS).
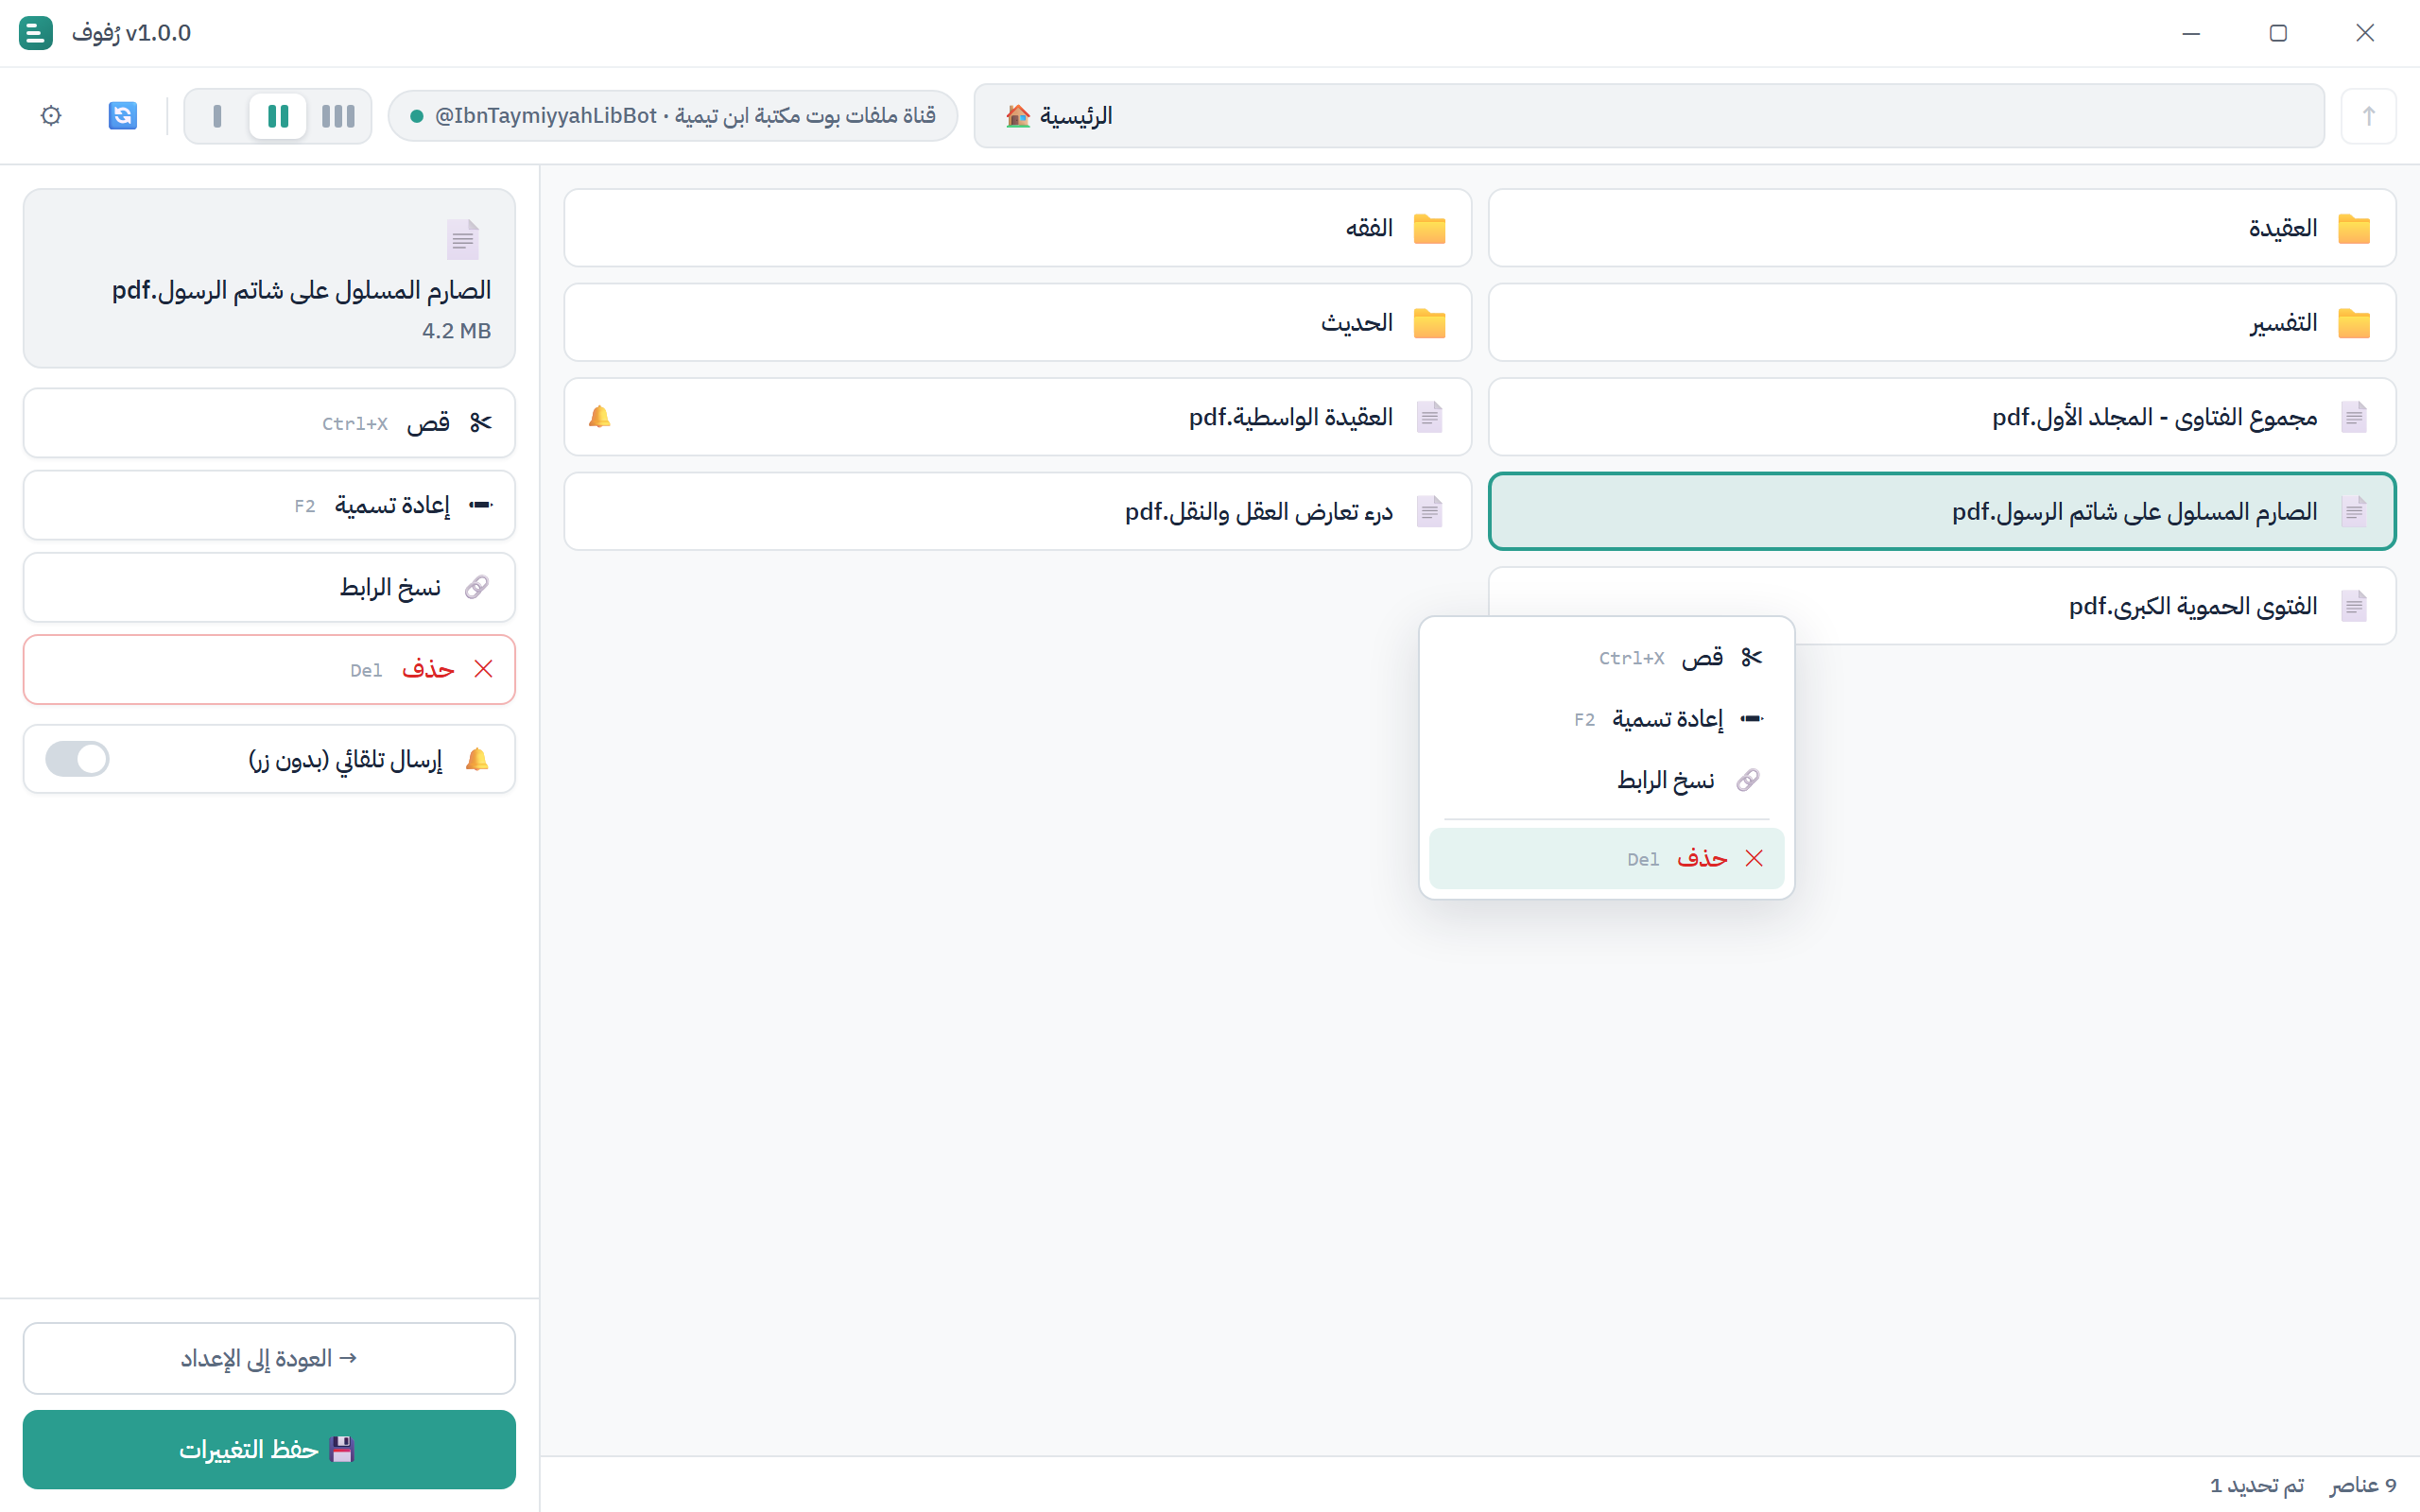
You'll be asked to confirm. Deletions take effect when you save.
Moving items (cut & paste)
Moving works like Explorer:
Step 8.1 — Select the items and Cut them — via the side panel, right-click → Cut, or Ctrl + X (Cmd + X on macOS). Cut items dim to show they're on the clipboard.
Step 8.2 — The clipboard accumulates: cut more items and they're added to it. Navigate to the destination folder — the clipboard persists as you move around.
Step 8.3 — Paste — via the side panel, right-click → Paste, or Ctrl + V (Cmd + V on macOS). The items move into the current folder.
Changed your mind? There's an intuitive way to un-cut (clear the clipboard) without pasting.
Renaming
Select a folder or a file, then choose Rename (side panel or right-click) and type the new name.
You can rename files and folders
You can rename both files and folders in place. Renaming only changes how the item appears in your bot's menu — the file itself is untouched.
Creating a new folder
Click 📁+ New Folder in the toolbar, type a name, and confirm.
Auto-send files (no button)
By default a file appears as a button users tap. To have a file sent automatically when a user opens its folder, turn on Auto-send (no button) for that file (in its action panel / right-click menu). Auto-send files never appear as buttons — they're delivered silently as the folder opens.
The dot-name shortcut still works
Naming a file so it starts with a dot (.) also makes it auto-send. The Auto-send (no button) toggle does the same thing without renaming the file, and you can switch it on or off any time.
If a folder has more than 10 auto-send files, the bot sends the first 10 and offers /next to deliver the rest in batches.
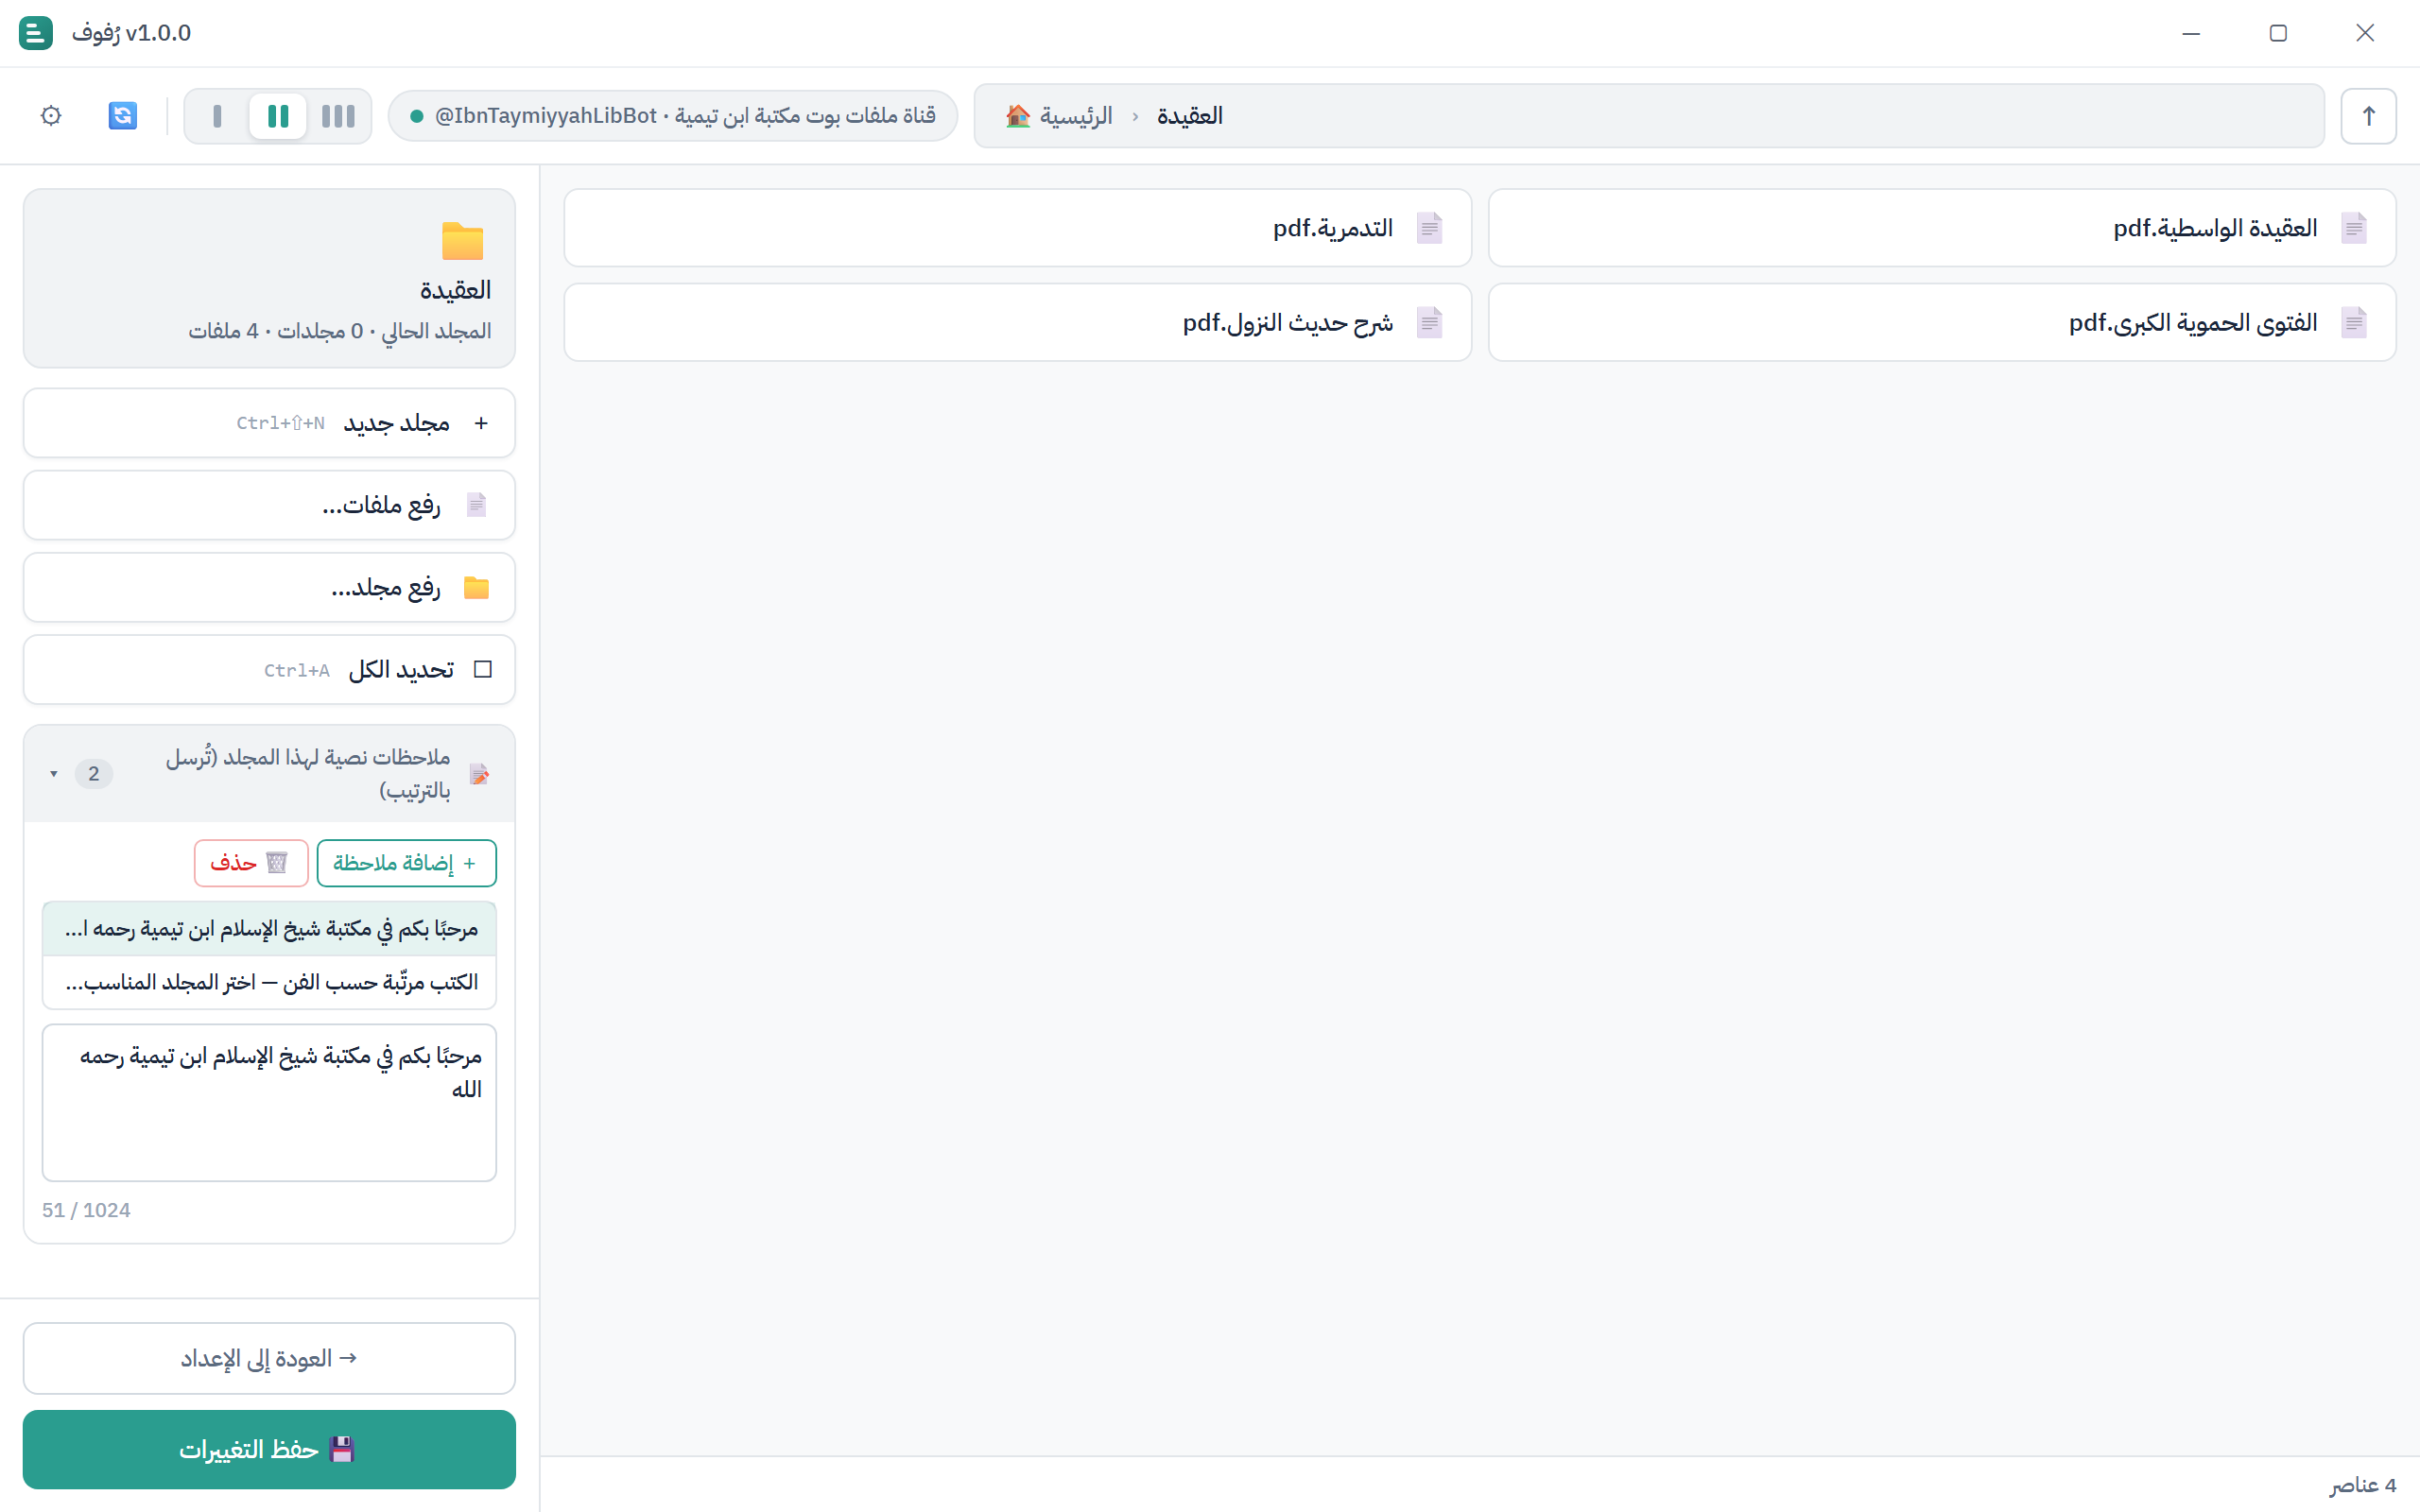
Text notes for a folder
A folder can greet users with one or more text notes — a description, announcement, or instructions. Add notes in the notes area of the viewer; you can add several per folder, shown in the order you set. Clear a note to remove it.
Copy a share link
Select a file or folder and choose Copy link to copy its direct share link. Share it with anyone — tapping it opens your bot straight at that file or folder. (Very long folder paths may not offer a link; files always do.)
Reordering
Drag a tile to a new position to set the order your users will see. The density control sets how many columns the menu uses.
Saving your changes
Nothing is sent to Telegram until you click 💾 Save. The Save button shows how many unsaved changes you have. Saving will:
- Upload new files you added.
- Remove deleted files from your channel.
- Apply your renames, moves, order, notes, and auto-send settings.
Leaving without saving
If you click ← Back with unsaved changes, Rufoof asks whether to discard them. Discarded changes cannot be recovered.